How to Build a Patio
Laying your own patio may seem like a daunting DIY project, but with some careful preparation and methodical working it can instantly transform an outdoor space in your garden, providing a new ‘garden room’ for years to come.
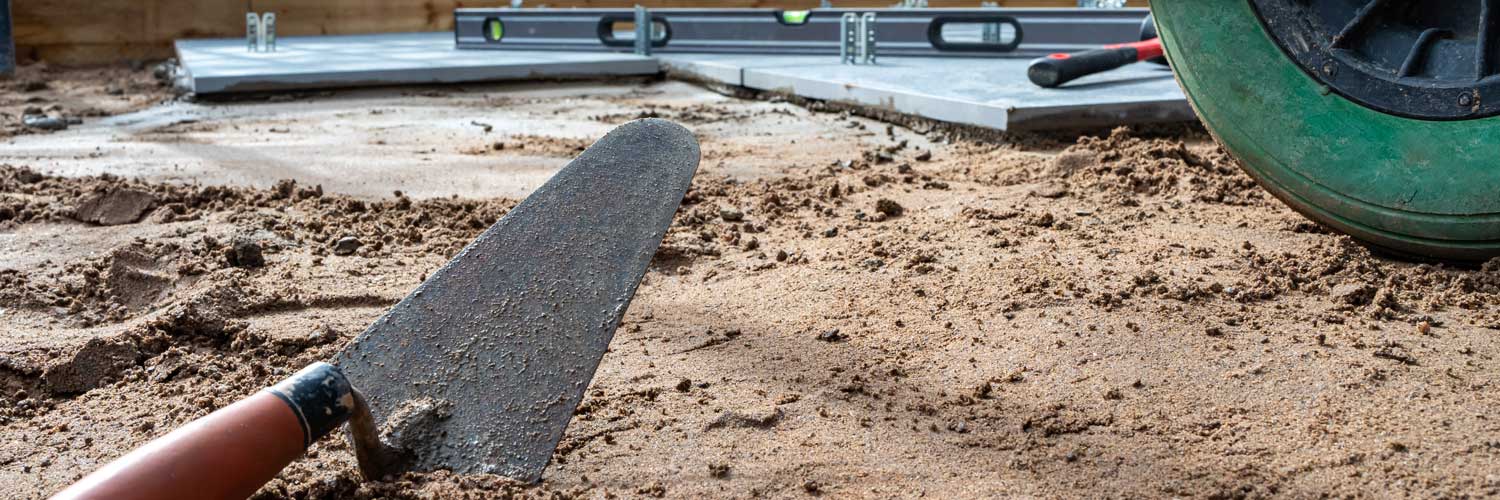
A simple, small patio can easily be laid in a weekend if tackled by two people – lifting and positioning stone paving is cumbersome and heavy work, a task made much easier with an assistant. Here we outline the basics of laying a simple concrete or stone slab patio.
SAFETY FIRST: Lift paving slabs with care and with two people, and wear suitable footwear. Dry cement and wet mortar can irritate your skin so make sure you are wearing protective gloves and long sleeves to protect your arms. Use goggles, gloves and a facemask if cutting slabs.
Preparation and planning
Before you start, spend some time planning the size and position of the patio you want. What will you be using it for? Is it big enough for garden furniture and your barbecue? Do you want it in the shade or as a suntrap?
If you are building a paved area flush with a house wall you must ensure that the finished height of the paving is at least 150mm below the damp course. There are specialised drainage solutions to get round this (for example for older properties with a lower damp course) but always seek advice on this from a professional contractor.
Mark the proposed area out in your garden using a brick line (string line and pegs) and builder's square (set square) then lay your slabs out in position before starting work to visualise the space.
There are five basic steps to follow in laying your patio:
- Dig a foundation
- Lay a sub-base
- Prepare your mortar
- Lay paving slabs
- Fill the gaps
How to create the foundation and sub-base layers
A solid foundation is essential for any garden landscaping project, so don’t be tempted to cut corners at this stage. Dig a foundation 150mm into the soil using your brick lines as a guide, with an additional 5 to 10cm added to the outside patio edges. Level with a rake and firm by walking on the surface (you may decide to hire a motorised plate compactor or wacker plate for a larger area).
The sub-base is essentially the underlay for your paving slabs, a layer of crushed aggregate that will provide stability, drainage and load-bearing capacity for your patio. Spread around 100mm of MOT Type 1 ballast, then tamp down firmly with your feet or a wacker plate.
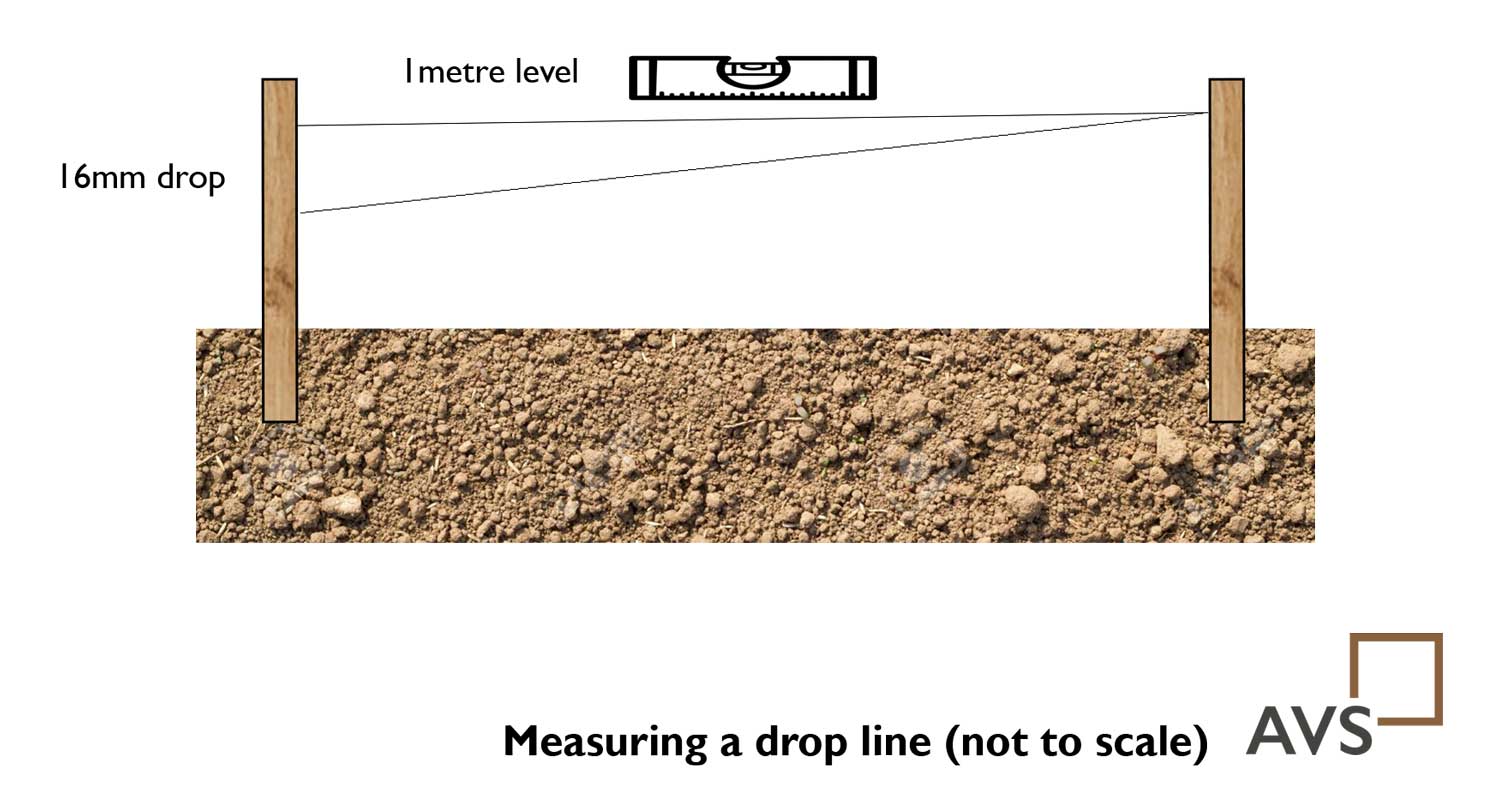
At this stage a long, straight length of timber is the perfect tool for ensuring that the sub-base is flat, and can be used later to check that the laid patio is level.
You will need to build in a slope of 1 in 60 at this stage, that is a 16mm drop for every 1m horizontal measurement, to ensure water drains away from the paving. You can do this with your string line, a spirit level and some simple maths.
How to prepare your patio bedding mortar
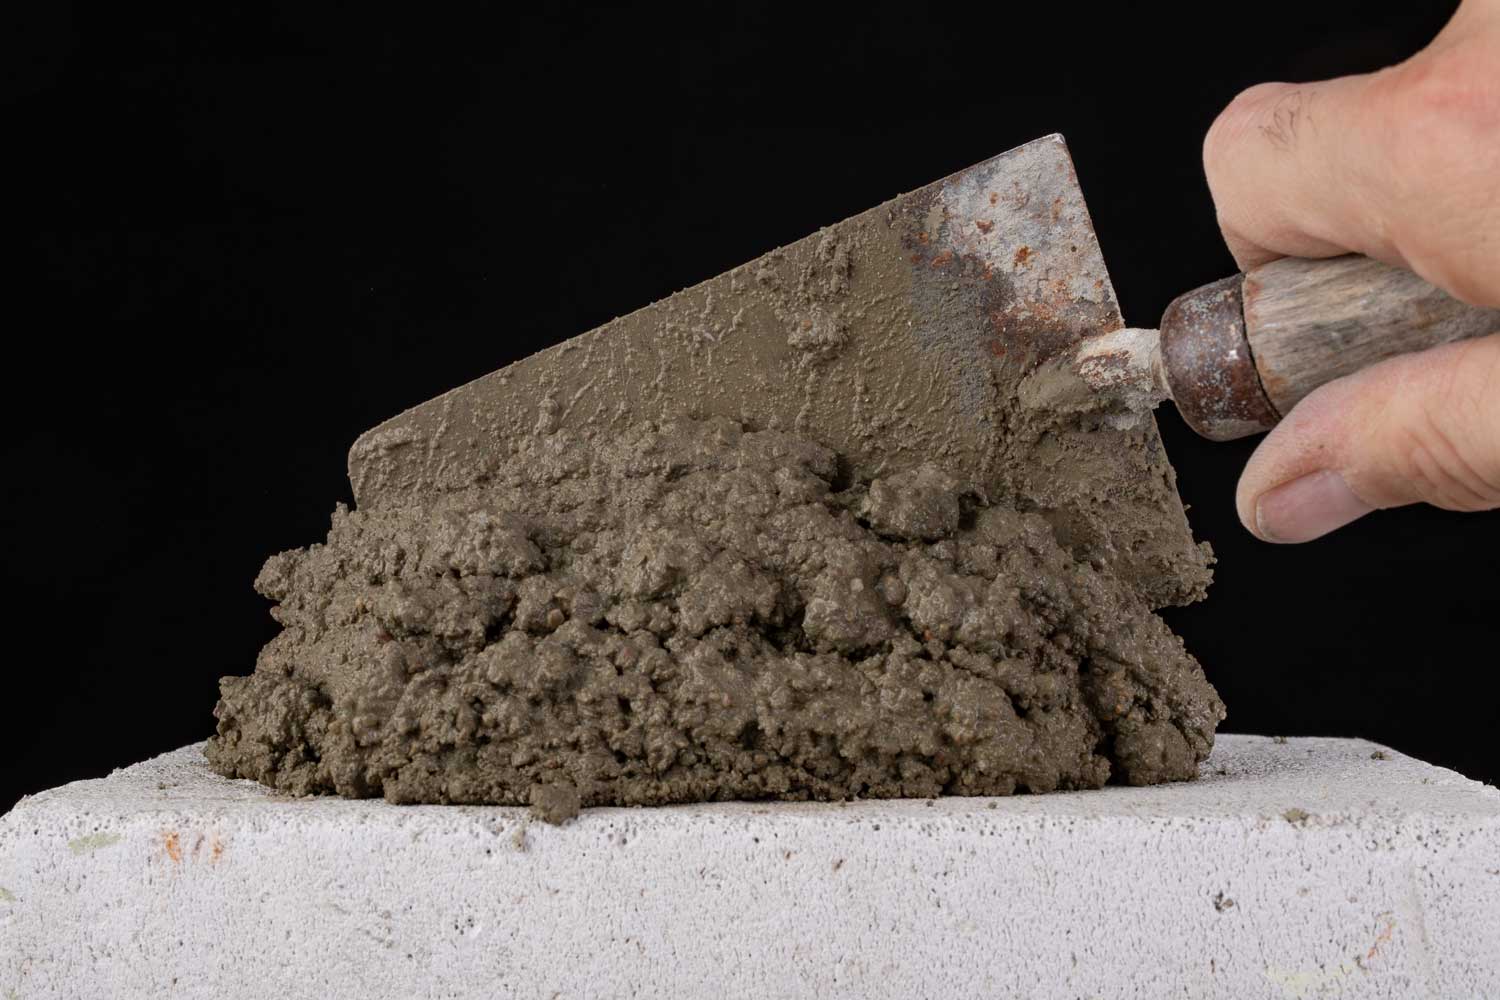
Prepare your mortar with a mix of four parts sharp sand to one part cement – you can use a large bucket or tub, however hiring a cement mixer will save you some work. Gradually add water until you have a thick, dough like mixture – a ball moulded between your hands should keep its shape without dripping water.
You will need to use your mortar within two hours (less in very hot weather) so mix the amount that you think you will need in that time.
TOP TIP - always wash any mortar from buckets or tools before it dries.
How to lay patio slabs
We’re going to use the individual bedding technique, which is more suitable for smaller projects, and as the name suggests involves spreading the mortar individually for each slab. Don’t confuse this with the ‘lump in each corner’ method that you might have seen used – this is not recommended as it can quickly lead to unstable, even broken slabs.
Starting in the highest corner of the sub-base, spread an even layer of mortar about 50mm deep to an area slightly larger than your slab. Dampen your slab to avoid it absorbing too much water from the mortar, then lay onto the concrete bed, carefully tamping down with your rubber mallet and a piece of timber until the slab lies flat, approximately 15mm into the mortar. Ensure that the slab is following the slope of your fall line, and neaten up any gaps in the mortar with your trowel.
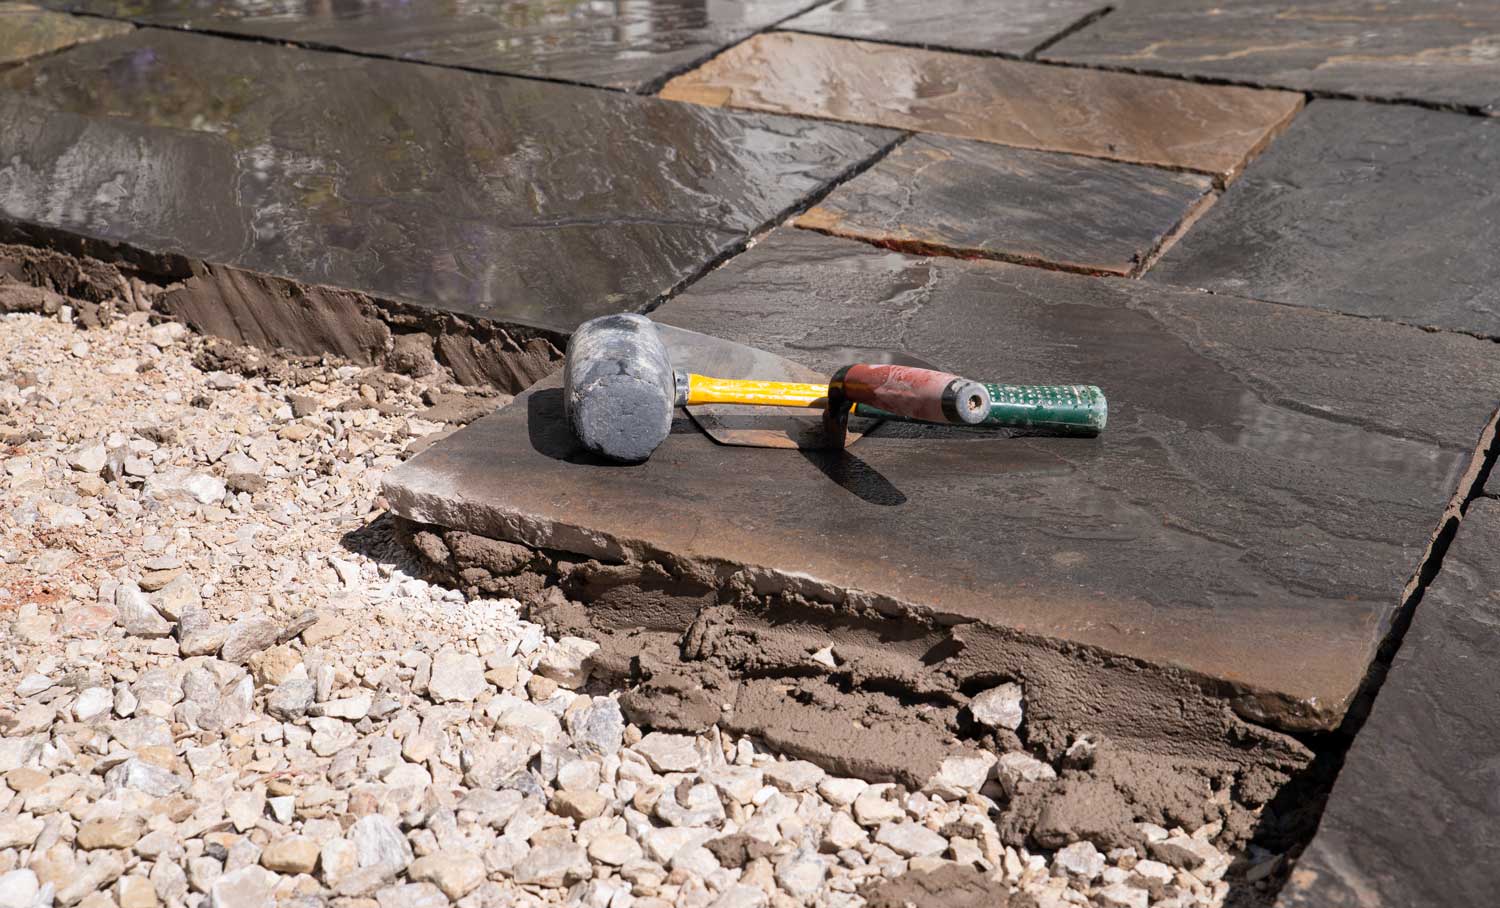
Once you’re happy with the alignment of your first stone, lay the first row of slabs in the direction of the slope, using your spirit level to maintain the slight fall between the slabs and your string line to keep everything square. Leave a gap of 5 to 10mm between each slab – an easy way to do this is to cut spacing pegs from a piece of dowel or timber.
Repeat this process along the two adjoining, flat edges, then begin to fill in the middle slabs – work so that you don’t step on any freshly laid slabs.
Once all your slabs are laid, use your fall string to check the level, make any slight adjustments then leave to dry for at least 24 hours without walking on the patio. Cover with a tarpaulin if there is any chance of rain.
How to cut paving slabs
If you’re flexible in where to site your patio then it’s possible to construct your paved area using only full slabs. However, if your patio needs to fit a defined area, or you are using different sized slabs as part of the design you may need to cut some paving stones.
The easiest way to do this is with a circular saw (which you can hire) fitted with a diamond masonry blade. Mark the cutting lines on the top and edge of the slab with a ruler and pencil, then carefully cut along the lines with the circular saw. Wetting the slab before cutting will reduce the amount of dust thrown up – ensure that you are wearing a facemask for this task.
Alternatively, ask at your local AVS Fencing & Landscaping Supplies branch if they have the facility to pre-cut your slabs for you.
Finishing your patio
After 24 hours, fill the gaps between the slabs with a pointing mixture such as EASYjoint, using a pointing trowel to pack and smooth the gaps, ensuring that any residue is brushed off the slabs before it dries.
Alternatively use a wet mix of three parts building sand to one part cement, slowly adding water until you have a smooth consistency. Work the mixture into the gaps with a pointing trowel, being careful to avoid getting too much mortar onto the slabs. Any excess can be brushed off with a stiff brush after a few hours once the mortar has started to harden.
A neat way to finish the edge of a patio, and to improve drainage, is to create a border by digging a small trench around the perimeter then filling with decorative aggregate or pebbles.
Ask the experts
For further advice about your paving project don’t hesitate to speak to our experts at your local AVS Fencing & Landscaping Supplies branch. They can talk you through the different options and even place your order in store. Our ranges of high quality paving are all available for home delivery within our AVS Branch delivery area.
-
How to Fix a Fence Post using a Concrete Fence Repair Spur
Need to stabilise a wobbly fence quickly and effectively? Rather than replacing the entire fen …21st Feb 2022 -
Top Ten Quick Garden Makeover Projects
For those of us lucky enough to have some outdoor space at home, we've all come to apprecia …23rd Aug 2021 -
Lawn Edging Like a Pro With Steel Edging and Tree Rings
Whether you have a small urban garden or a sweeping country estate, keeping the edges of your …14th Jul 2021


