How to Build a Raised Sleeper Bed
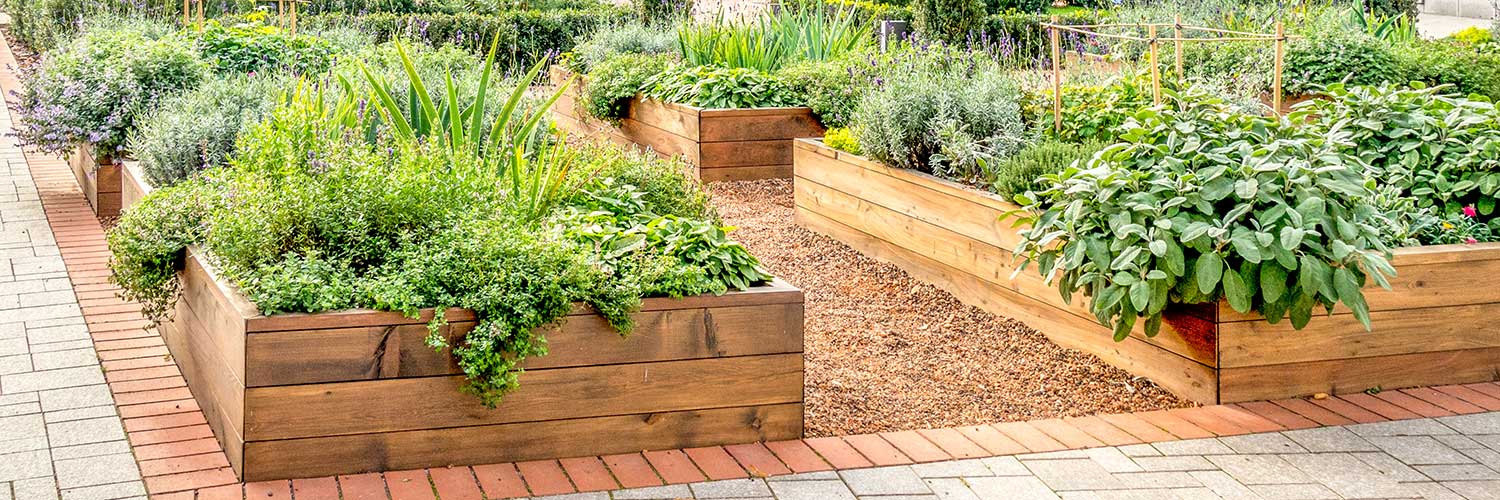
Raised beds constructed from railway sleepers are a great way to introduce additional growing areas to your garden, and have several applications:
- Dividing a garden area, such as creating a decorative edging wall to a garden area or patio – raised beds can be laid directly onto a hard surface
- Creation of different visual planting heights in your garden
- Improved accessibility to the bed by gardening at a raised level, perfect for elderly or disabled gardeners (or anyone wanting to save their back or knees)
- Choice of an exact type of soil or compost to fill the bed, allowing the growth of fruit and vegetables, or plants with a specific soil requirement
- Containing a children’s sandpit
- Creating a raised pond area with a hard liner
- Easily introducing flower beds to a paved or gravel front garden
We stock a range of both pressure treated
softwood railway sleepers and oak hardwood railway sleepers, and all of the extras that are needed to build your sleeper bed. Alternatively, you can select from a range of Raised Bed Kits with everything included. 
We also stock weathered, reclaimed railway sleepers however these are best used for applications such as retaining walls, steps and path edging, as they contain residual creosote and other contaminants that can seep into flower or vegetable beds.
What do I need to build a raised bed?
- a handsaw or circular saw
- a drill
- railway sleepers
- 150mm timber screws
- 250mm timber screws if building more than one layer
- weed suppressant membrane
- top soil or compost
Optional:
- small pieces of fence post
- L shaped brackets
Where to site a raised bed
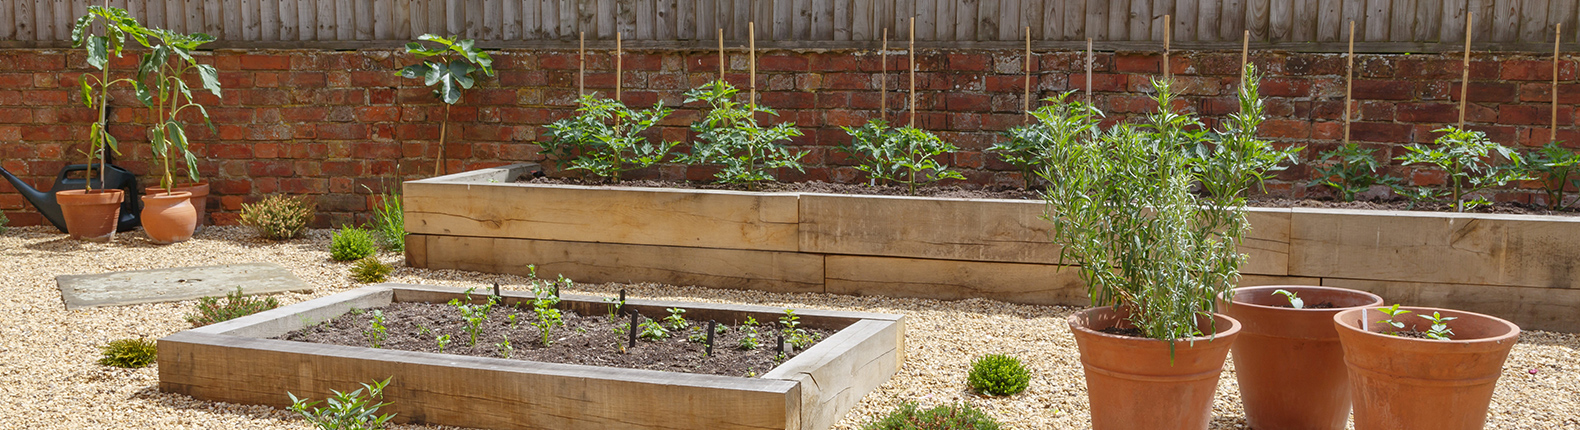
Raised beds can be built on either hard or soft surfaces in the garden but be careful to assess how much sun the area will get if you are planning to grow fruit or vegetables. Some food crops, such as salad vegetables are more suited to partial shade whereas others, such as tomatoes enjoy full sun. Lay your sleepers out in your chosen area to properly visualise the finished bed, ensuring that the area is level.
If placing raised beds next to each other, remember that you will need access between them for a wheelbarrow.
What size is a raised bed?
There is no fixed size for a raised bed, it depends on the intended use or the space available, but you should be able to easily reach the middle of the bed without stepping on the soil. The standard method is to use a full-sized sleeper (240cm) for the long sides, with half sleepers (120cm) making up the short sides.
A single sleeper depth raised bed is suitable for shallow rooted crops such as salad vegetables, whereas a double or triple layered bed allows room to grow root vegetables and larger shrubs.
How to cut railway sleepers
Cutting softwood sleepers is possible with a handsaw, but a circular saw (which can be hired for the job) is an easier option and will definitely be required for oak and reclaimed sleepers. The blade of a circular saw is not deep enough to cut all the way through a sleeper, so you will need to cut from one side, turn the sleeper over then cut from the opposite side.
Be careful when cutting reclaimed sleepers to avoid any nails or bolts that may still be present in the sleeper.
Remember to seal any cut surfaces with End-Grain Treatment. Alternatively ask your local AVS branch if they have the facility to pre-cut your sleepers to size.
Assembling a raised sleeper bed
If assembling on soft ground, remove any weeds and level the surface with a rake. If the ground is sloping you may need to use ballast to properly level the space.
Lay the sleepers out with the short side on the ground, interlocking in the pattern below. Fix each corner with two 150mm timber screws – you may find it easier to pre drill the holes for these.
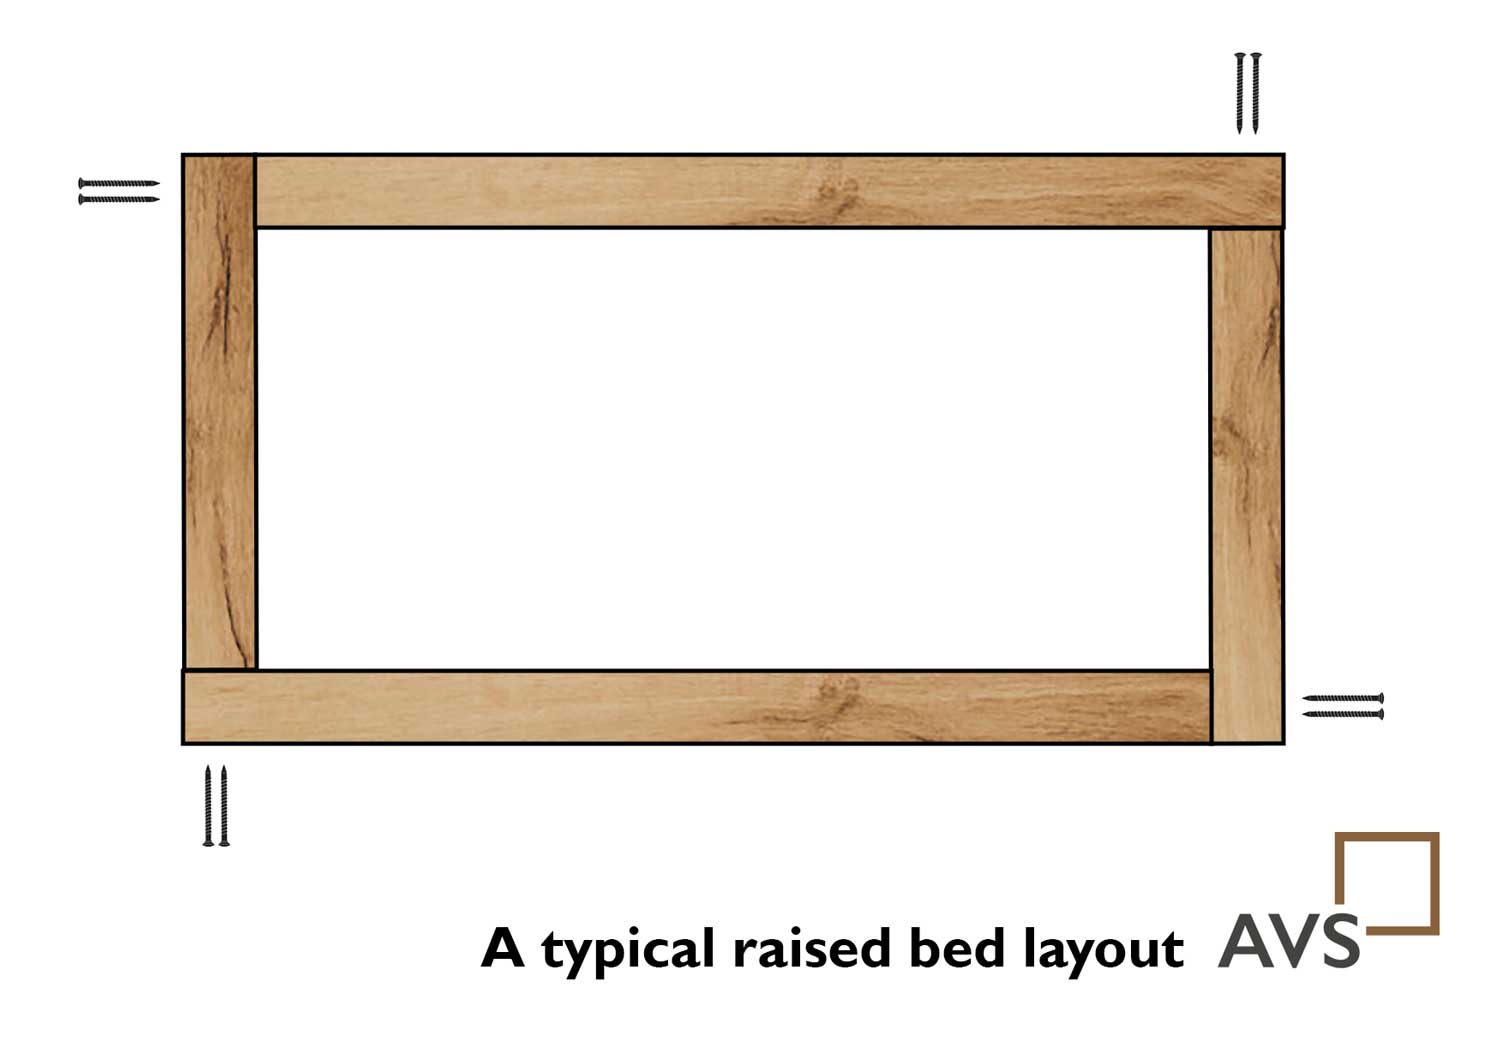
You can additionally screw L shaped brackets to the internal corners for added strength. When constructing a raised bed on a soft surface it can also be beneficial to hammer short lengths of fencing post into the ground on the inside corners to stop any lateral movement.
Further layers of sleepers can then be added to raise the bed to the required height. Lay the next layer of sleepers on top, ensuring the corner joins overlap as with bricklaying. Join the sleepers together as before, then attach the two layers by drilling down through each corner with two 250mm timber screws.
Finally, line the bottom of the raised bed with weed suppressing membrane. This will prevent any weeds from growing up from the soil below, whilst allowing free drainage of water from the bed. If laying the raised bed on a hard surface such as a patio it is also advised to add a layer of gravel to assist drainage. Then fill with your chosen soil or compost,lightly water and leave the soil to settle for at least a week before planting.
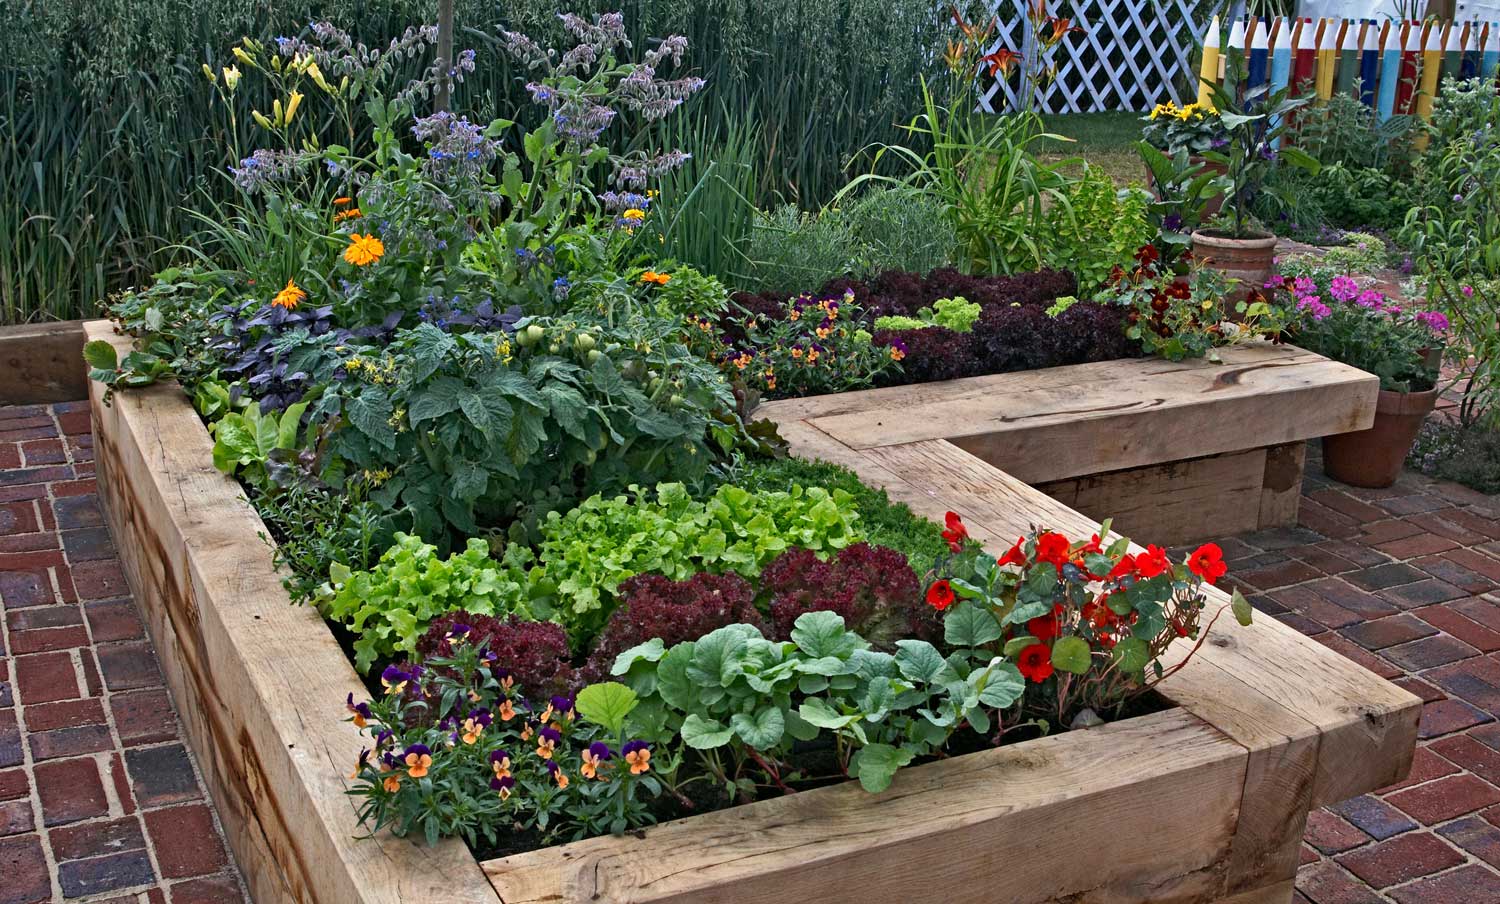
For an added touch you can cap the top edges of the bed with a layer or wider and thinner timber, creating a seating surface around the edges, or even construct an integral seating area with additional sleepers like in the picture below. Finally, treat the outside surfaces with timber paint or treatment, or simply enjoy the natural texture of the wood.
Ask the experts
For further advice about a raised bed project don’t hesitate to speak to our experts at your local AVS Fencing & Landscaping Supplies branch. They can talk you through the different options and even place your order in store. Our ranges of high-quality railway sleepers are all available in-store (subject to availability) or for home delivery within our AVS Branch delivery area.
-
How to Fix a Fence Post using a Concrete Fence Repair Spur
Need to stabilise a wobbly fence quickly and effectively? Rather than replacing the entire fen …21st Feb 2022 -
Top Ten Quick Garden Makeover Projects
For those of us lucky enough to have some outdoor space at home, we've all come to apprecia …23rd Aug 2021 -
Lawn Edging Like a Pro With Steel Edging and Tree Rings
Whether you have a small urban garden or a sweeping country estate, keeping the edges of your …14th Jul 2021


